
via Fstoppers https://ift.tt/koYnpTr
 |
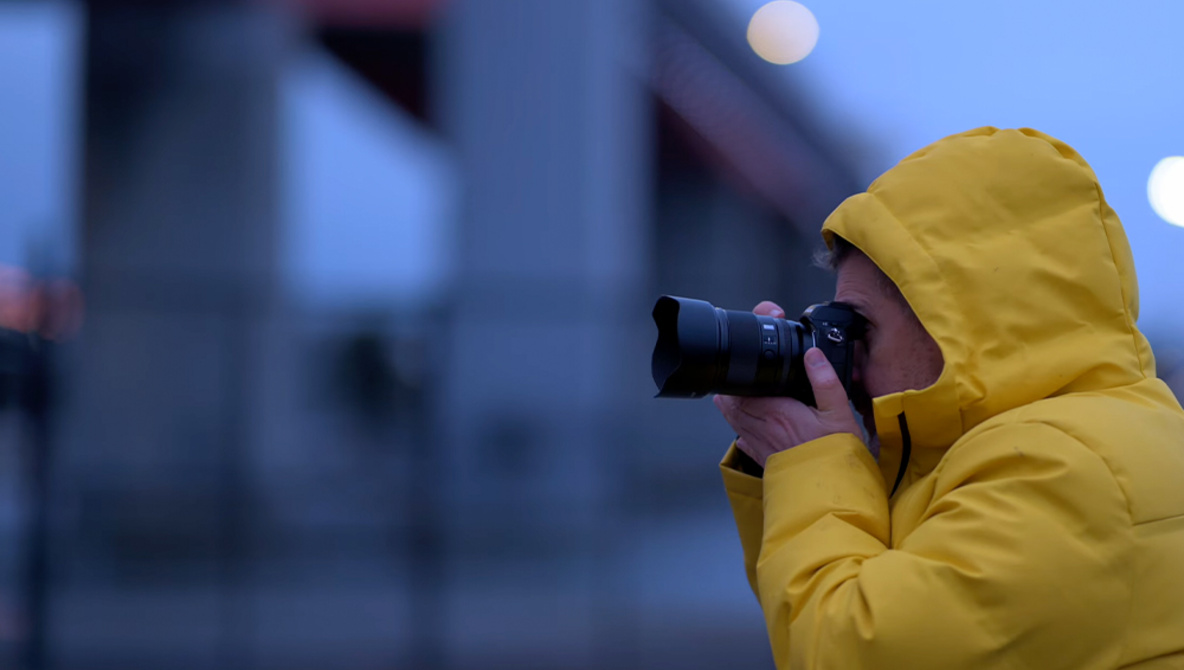
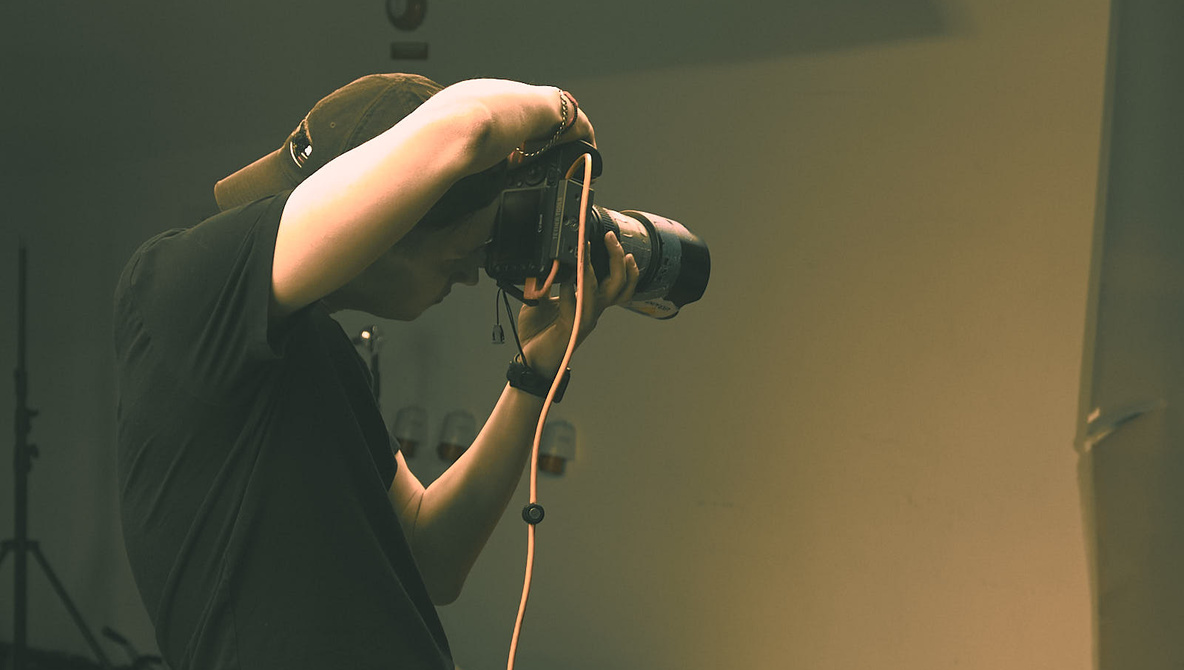
For a professional photographer, every press of your shutter button can prove to be something of a double-edged sword. Sure, each extra shot you take is a new opportunity to turn your vision into reality or to sell another of your creations. But each time that shutter fires, you're also increasing your editing workload, and with it the time you'll need to spend in front of a monitor rather than behind your viewfinder.
With the rise of artificial intelligence, however, a new option is rapidly becoming more viable. Thanks to AI image editors, your computer can now potentially take on much of the digital darkroom work for you, freeing you up to spend more time with camera in hand.
I recently took a look at one such option in the form of Aftershoot Pro, a program which promised to help with culling while also taking on some basic editing tasks. But if you don't need the culling help, another option called Neurapix might prove to be even more attractive.
Working as a plugin for Lightroom Classic rather than a standalone app, Neurapix focuses solely on image editing, where it has rather more comprehensive capabilities than its rival. And thanks to the recent launch of Neurapix Instant, it now also offers a choice of either locally-hosted or cloud-based editing.


Available immediately, Neurapix is priced at $0.03 per image for the first thousand images processed in the cloud during each one-month window, after which subsequent images are cloud-processed at a cost of $0.02 per image. If you opt to have the plugin automatically level your images in the cloud as well, there's an additional cost of $0.01 per straightened image.
Additionally, you can purchase a flat-rate subscription to Neurapix Instant, which allows unlimited editing and straightening performed on your own hardware. This also includes unlimited free processing of your self-created SmartPresets in the cloud while you're waiting for them to be available for use on your local machine. Neurapix Instant is priced at $79.95 month-to-month, or $49.95/month with an annual subscription.
Pricing for ready-made SmartPresets beyond the three included with the plugin varies but each allows unlimited usage once purchased, so long as you either have a Neurapix Instant subscription or pay the aforementioned per-image cloud processing fees. At press time there are currently 14 SmartPresets in Neurapix's store with price tags varying from 95 to 280 euros.
A one-week, 1000-image free trial of Neurapix's cloud-based processing is available to allow you to see the results for yourself with your own images. As for the ready-made presets in the SmartPresets Store, you can test each with up to 20 of your own images in each 48-hour period prior to purchase.
 |
| Neurapix integrates with Lightroom Classic 9.0+ as a plugin that's installed via the Creative Cloud Desktop app. |
While alternatives certainly exist these days – even from Adobe itself in the form of Lightroom CC – chances are good that like most of us, you're still using the somewhat-creaky 800lb gorilla in the room, Adobe Lightroom Classic.
And since that likely forms the heart of your workflow already, it's good news that Neurapix is itself a tightly-integrated plugin for Lightroom, unlike Aftershoot which is a separate program that you need to learn to use and shoehorn into your workflow alongside Adobe's software.
Neurapix's tight integration means that there's really not a lot to show you in terms of its interface, though. It's installed through the Stock & Marketplace section of Adobe's Creative Cloud Desktop app. Once installed and you have logged in with your Neurapix account, it will then automatically download, install and update anything else it needs such as the code underlying Neurapix Instant or your purchased or self-created SmartPresets as needed.
On the Windows platform which I'm using, Neurapix is accessed through the Lightroom File menu's Plug-in Extras section, and it's here that you'll command the plugin to run new editing tasks, whether processing them in the cloud or locally and regardless of whather you're using a self-generated, bundled or store-bought SmartPreset.
 |
| Once installed, cloud or locally-processed editing jobs run via Lightroom's Plug-in Extras menu. |
If your processing is being done in the cloud, you'll also revisit this menu to import your edits after Neurapix emails you to inform you that they're ready for application.
When you want to create your own SmartPresets, you'll do so by selecting the images from which to train Neurapix's algorithms in Lightroom's library, and then opening Lightroom's Export tool. You'll find a new "Neurapix: Train SmartPreset" option has been added to the "Export To" dropdown in Lightroom's Export dialog, and here you'll name your SmartPreset before hitting the Export button.
You can also return here to add further images to a SmartPreset which hasn't yet been fully trained. (At least 500 raw images are required to begin the training process, but you don't have to select and add them all in one go.)
Finally, if you want to tweak an already-trained SmartPreset, you can do so by sending your manual adjustments back to Neurapix, which again is done through the aforementioned Plug-in Extras menu. And obviously, the workflow on macOS will be quite similar, although the precise location of the menus will differ due to Adobe Lightroom's inconsistencies between the two operating systems.
 |
| The Project name is used both when restarting batches you've stopped midway, and to select results from cloud jobs to be applied to your local Lightroom library. |
Overall, Neurapix integrates into Lightroom really nicely, with almost no new user interface options to learn and very little change needed to your editing workflow. There's really only one possible point of contention, assuming that you're already a Lightroom Classic user, anyway. That's the fact that the plugin requires you to use raw files.
If you select any JPEGs either for editing or in an attempt to train your own SmartPreset, Neurapix will simply ignore them and on completing the assigned task, notify you of the number of JPEG files that it skipped.
If you're already shooting Raws, that's obviously no big deal. And the decision does make sense if you consider that raws are going to provide the best scope for editing without adversely affecting image quality.
For those who still prefer a JPEG-based workflow due to the much lower storage requirements, though, it's a bit of a shame. For now at least, you're faced with a choice of either switching filetypes or skipping Neurapix altogether.
 |
| SmartPreset training is done via Lightroom Classic's Export panel and requires at least 500 already-edited raw images to start the process. |
So how's performance when using Neurapix in the cloud? I have to say I came away rather impressed.
Obviously your mileage is going to vary depending upon the speed of your internet connection and the load on Neurapix's servers at any given time. With that proviso out of the way though, even on a very modest internet connection which tests at around 60Mbps downstream and 12Mbps upstream, it took as little as one second per image to upload the necessary data for a batch of raw files averaging around 35MB apiece.
Editing took another 1.6 seconds per image, and my edits were then downloaded and applied at a rate of around 4 images per second. In all, that's about 2.9 seconds per image, which is clearly much, much faster than I could have performed the same editing by hand.
And even on a 2018-vintage Dell XPS 15 laptop, using Neurapix Instant to perform the editing locally was similarly swift. I averaged about 2.5 seconds per image to process the same batch of raws, so long as the necessary SmartPreset data had already been downloaded first. With a modern, high-end computer and fiber internet connection, the results would likely be orders of magnitude faster.


Downloading the SmartPreset data was a bit more time consuming, taking around 10-11 minutes apiece, but that only needs happen the first time each preset is used unless it is subsequently retrained. (And again, would be much faster on a really high-speed connection.)
One task which did take rather longer was the initial generation of custom SmartPresets. To get started, you'll need to provide at least 500 raw images which have already been edited in Lightroom, so that the AI algorithms can learn your style.
Ideally, you will also want to be using shots with some consistency in their subject matter, environment and editing to attain the best training results for each preset. That's likely going to be easier for someone like an established wedding, event or school portrait photographer than, say, someone who tends more towards travel or street photography with more disparate subjects.
The requirement for 500 training shots might seems like quite a bit, incidentally, but it's actually on the lower end when it comes to training AI image editors. Aftershoot Pro, for example, requires five times as many images with which to provide even a basic profile, and the recommendation from its makers is to provide at least 5,000 images. And past versions of Neurapix needed as many as 6,000 shots to create a new profile.


By whittling this down to just 500 images, the current version of Neurapix has made the training process much more approachable, even if it's still a bit of a chore. But be that as it may, training can still take a while, especially if you want to do your editing locally.
In my testing it took around 14 minutes to upload enough data to start training, and a further 33 minutes for the cloud version of the SmartPreset to be created with the minimum dataset of 500 images. Just as with editing, you get an email notification from Neurapix when this preset is ready to be used.
And if anything my experience was on the swift side, likely because I generated the profile in a less-busy period for the Neurapix servers as I was working during the weekend. The plugin's creators tell me that initial training of a SmartPreset typically takes a couple of hours to complete.
But on the flip side of the coin, generation of a downloadable version of the preset for use with Neurapix Instant took around three days to be generated for me, which is apparently longer than is typical. The Instant version of the profile actually differs from that used in the cloud, as it it compressed and optimized for use on Windows or macOS hardware, and according to the company this typically takes up to two days.


This isn't really the holdup it might at first appear to be. During the waiting period after generation of a new SmartPreset users are entitled to use the cloud version with no per-image costs or cap on usage.
The provision of free cloud editing while you wait for an Instant SmartPreset to be generated means that I see this as pretty much a non-issue. My only slight complaint is that while Neurapix does send out notification emails when SmartPresets are first generated and cloud edits are complete, there's no corresponding email when an Instant SmartPreset becomes available for download.
Of course, if you happen to go into the plugin to perform any editing once the preset is ready for download, it will immediately become obvious that the "Edit with Neurapix Instant" checkbox for the SmartPreset is no longer grayed out, but it'd be nice to have a notification regardless. If you're on a slow connection or paying for mobile data you might be waiting to be able to edit locally, after all.
Incidentally, while the optimized Instant profiles do differ from those used in the cloud – and I did see some differences in the slider adjustments made by both – the results were visually almost indistinguishable from each other, even after careful comparison in Photoshop.


That's the good news, but now the less-good: While the Instant version of the plugin does its work locally, this sadly doesn't mean that you can use it entirely offline if, say, you're working from a laptop in a location with limited internet access.
I gave this a try, switching my laptop to airplane mode with Lightroom running and having already used Neurapix prior to disabling my data connection. But unfortunately, if you attempt to summon the plugin without an active internet connection you receive multiple error messages and offline use proves to be impossible.
I'd like to see Neurapix enable this capability for Instant users, even if there remains a requirement to reconnect to the company's servers on a regular basis. It would be nice to have a truly offline AI editing tool that could be used for editing during downtime in the field.
I should note here that my own photography is pretty varied and not especially well suited to an app like this. I only rarely shoot weddings or event photography, and don't typically shoot many hundreds of photos in the same locales and with the same lighting. My photography, then, represented a challenge for Neurapix's algorithms.


And I have to say that bearing that in mind, I think it nevertheless did a decent job of mimicking the style of the shots on which I trained it. That's not to say it was 100% of the way there all of the time, certainly – the occasional shot felt like it needed a little bit of tweaking to the exposure still.
I also noticed that the AI used a slightly gentler touch on the vibrance/saturation and dehazing controls than did I. The latter is, perhaps, because only some of my training shots had hazy backgrounds leading to some inconsistency in my editing style.
But did it get me most of the way there, and greatly speed the process of editing my photos? Absolutely! And I was quite surprised to find that unlike Aftershoot Pro, which didn't really touch anything more than the sliders in Lightroom's Basic panel, Neurapix Instant attempted to mimic my tweaking of nearly every slider and control other than for things like sharpening and lens correction.
The one thing it doesn't do on the editing front which Aftershoot Pro did attempt – albeit pretty imperfectly – was to crop my images for more attractive composition. Neurapix won't cause Lightroom to crop more than is necessary to straighten the shots, if I selected its straightening option.


This means you'll still want to do a quick edit pass to do some cropping unless you're confident that your out-of-camera framing was sufficient for everything you shot. And thus it's not really a big deal to throw in some slight tweaks to exposure etc. for the occasional shot as needed at the same time.
I felt that the straightening tool did a very good job overall. For the most part, I couldn't really choose between its results and those of the Auto Angle / Upright Level tools in Lightroom. Adobe and Neurapix's equivalents each did a slightly better job than the other of fine-tuning straightness with about equal regularity.
But unlike Lightroom's multiple leveling tools which would occasionally get an image wildly wrong, Neurapix never made a wildly incorrect leveling adjustment in my testing. For that reason, I'd absolutely recommend that Neurapix Instant users forego Adobe's options in favor of the plugin's straightening tool, given that there's no extra cost and no significant reduction in processing speed for doing so.
But for users who are working solely in the cloud, the cost of the Straightening tool makes it a harder sell. Here, unless money is not a significant concern I'd probably recommend just using Adobe's tools instead. Lightroom's Auto Angle tool doesn't play nicely with batch processing, but the Transform panel's Upright tool can be quickly applied to a batch of images at no extra cost and those occasional incorrect adjustments quickly reverted.
 |
|
| Lightroom's leveling tool (left) has an occasional tendency to key off completely the wrong thing. Neurapix's equivalent tool (right), while mostly near-indistinguishable, never took the bait in these less-typical situations, making it the better choice. | |
Clearly, just like its rival Aftershoot Pro, Neurapix Instant's relatively steep pricing means you're only going to want to consider it for your editing if you're a pro who tends to shoot significant quantities of imagery. Unless your pockets are quite deep or you're earning money from your creations, it's going to be hard to justify spending roughly 5 times as much on editing as you do on Lightroom in the first place.
And while Neurapix's cloud pricing is rather more affordable, consumers will likely find the 500-image training hurdle still too cumbersome, even if it's much easier to clear than those of other AI editors. With only three bundled presets and third-party presets carrying steep pricing of their own, this is clearly only a product for pros, then.
But if you're making money from your creations, well... time is money, and Neurapix (both in its cloud and instant variants) has the potential to save you a lot of time. That's going to make it rather easier to justify the cost.


Although it lacks the culling and cropping features of Aftershoot Pro, its image editing feature set is much more comprehensive. And it is much easier to train with your own style as well, making it by far the easier recommendation of the two programs. And that's even before you consider that it will fit into a Lightroom Classic-based workflow much more seamlessly.
While I'd really like to see support for JPEG editing and a truly offline capability as well, I'd highly recommend pros – especially those in wedding, portrait and event photography – give it a try as-is!
| What we like | What we don't |
|---|---|
|
|
![]()
 |
| Nicolas Remy at work, with the Nikon Z9 inside a Nauticam NA-Z9 housing, Nauticam 140mm glass dome port, and 2x Retra Flash Pro strobes. Photo credit: Léna Remy |
Nicolas Remy is an underwater photographer born in France but currently based in Sydney, Australia. Nicolas fell in love with diving in the late 2000s and now works as a full-time photographer and photography coach alongside his wife, Léna. A long-time DSLR shooter, Nicolas recently switched to mirrorless, and over the past few months, he’s been putting Nikon's flagship Z9 to the test in one of the most photographically challenging environments imaginable.
We caught up with Nicolas remotely from his home in Sydney. He explained his background and went into detail about some of the difficulties unique to shooting underwater. And, of course, he also shared his thoughts on how a modern mirrorless camera like the Z9 performs compared to the DSLRs he had been using for more than 15 years.
The following interview has been edited for clarity and flow.
I played with my mother’s film camera when I was a kid, but it wasn’t until 2006 that I had the realization that digital technology suddenly made so many more things possible. So I started reading photography books and got really into the technical aspects of it.
Then, when my then-fiancée and I visited Australia in 2007, we took scuba diving lessons and fell in love with diving. I bought an underwater housing for my DSLR, and we just went from there. We moved to Australia permanently in 2017, and when COVID happened, it gave me some time to consider what I wanted to do. That’s when I decided to make underwater photography my main occupation. I began to find success with photo competitions and started doing some brand partnerships, and in 2021 I quit my IT job to dedicate myself to our underwater photography school.
I was mostly using the Nikon D500 and D810. For me, the D500 was the gold standard because it has great autofocus, and because it’s APS-C format, the focus coverage is very wide compared to most DSLRs. I used both those cameras for a really long time, and I still shoot with the D500. I love it.
 |
| Close-up view of a common octopus, photographs under the Clifton Gardens jetty, in the heart of Sydney's natural harbor (NSW, Australia). Nikon Z9 | Nikon Z 105mm F2.8 S | ISO 640 | 1/200sec | F20 Nauticam NA-Z9 housing with Nauticam EMWL 160°, a 'bug-eye' wet conversion lens, 2x Retra Flash Pro strobes. Photo credit: Nicolas Remy |
It’s been clear for some time that in general, mirrorless cameras have certain technical advantages compared to DSLRs when it comes to things like the viewfinder experience, advanced subject detection autofocus, and so on. But shooting underwater isn’t like shooting on land. Battery life becomes a major concern because you can't keep swapping batteries when you’re shooting underwater for hours with the camera in a housing. And fish and underwater animals don’t look a lot like cats or dogs or people, so subject detection can get confused. Plus, there’s often a lot of particulate matter floating in the water. That reduces contrast, which is challenging for autofocus. Subject recognition doesn’t have a lot of color to go on, either, as colors quickly disappear with depth.
Underwater photography is like a niche within a niche, with many specific challenges.
I did experiment with a smaller-format mirrorless camera for underwater photography a few years ago, and it was great in clear, shallow water where there was plenty of light, but when I used it in lower-light, or murkier water, which is typical temperate diving conditions, the autofocus struggled a lot. Underwater photography is like a niche within a niche, with many specific challenges. So when I started using the Nikon Z9, those were all the things I wanted to test.
It really only makes a difference when you do something we call 'muck diving.' That’s when you dive right down to the seabed to find the wildlife that hangs out in the sand. To get an interesting angle, you often have to push the camera right down into the sand, and the bigger camera and housing means you can’t get quite as low as you can with a smaller setup.
Very different from what I expected. I’ve used a few Nikon DSLRs, and I was expecting the Z9 to be an iterative improvement, but it’s a paradigm shift. Especially the viewfinder. In underwater photography, like all wildlife photography, it can be tricky to get close to your subject. Sometimes you have to squeeze between rocks and fight with currents, and once you’re in position, you have to take a test shot to see if the framing and lighting is right. With a DSLR, reviewing your photos means taking your eye away from the viewfinder and tilting the camera down, which risks bumping against a rock, kicking up sand, or scaring the subject.
It took me a while to get to grips with the Z9’s autofocus system, but I’ve found that sticking with AF-C and 3D AF tracking works very well.
But with the electronic live view, the Z9’s viewfinder is always bright enough to compose a shot, and I can check a test image without having to reposition and look at the back of the camera.
 |
| The two shells of the Nauticam NA-Z9 housing open. Using an intricate combination of levers and gears, the key camera controls are arranged within reach of the divers' fingertips near the housing handles. Photo credit: Nicolas Remy |
 |
| The Nikon Z9 with the sensor shield visible, tucked in its Nauticam NA-Z9 housing. Photo credit: Nicolas Remy |
It took me a while to get to grips with the Z9’s autofocus system, but I’ve found that sticking with AF-C and 3D AF tracking works very well. The D500’s autofocus coverage is very wide, but the Z9’s is almost the entire frame, which is a major difference, and the autofocus is very sticky, even in low light and murky waters. Subject recognition doesn’t always work with marine life, but I have had some success with seahorses and various fish species. It saves me a lot of time.
[Writer's note: Since we spoke, Nicolas has published a detailed comparison of the D500 and Z9's autofocus here].
Cameras’ rear LCDs are difficult to see underwater, because there are too many reflections. We prefer to shoot through the viewfinder, and I often use an angled finder to make it easier to see through a dive mask, especially when shooting upwards. I was a bit worried about the effect that always using the EVF would have on battery life, but I’m finding that I can get six or seven hours of shooting out of the Z9 on a single battery. Typically I’ll be in the water for two to three hours, and I still have about half of my battery life left when I come up.
 |
|
Marine life abounds near Fish Rock Island, off South West Rocks (NSW, Australia). Nikon Z9 + Nikon 8-15mm (at 15mm) fisheye with FTZ adapter | ISO 400 | 1/200sec | F11 Photo credit: Nicolas Remy |
There’s really only one thing I wish could be improved, and it’s something that is a factor with many mirrorless cameras, I believe – the Z9 doesn’t like focusing under red light. Unfortunately, for night diving, we tend to use red lamps for illumination because it’s less intrusive for sea life. The Z9 can still focus on a subject lit by a red lamp, but it becomes very slow.
The lens I’ve used most on the Z9 is the NIKKOR Z MC 105mm F2.8 VR S. I love it for macro work and portraits of shy marine life. It focuses quickly, and there’s no focus breathing. I can’t use the NIKKOR Z MC 50mm F2.8 because it extends during focusing. A native Z-mount 50mm or 60mm macro with internal focusing would be amazing, but I’m very happy with the 105mm and the older AF-S Micro NIKKOR 60mm F2.8G ED via the FTZ adapter. My other main lens is the AF-S FISHEYE NIKKOR 8-15mm F3.5-4.5E ED, also via an FTZ adapter.
Fisheye lenses are very popular with underwater photographers because they let you get very close to large subjects, meaning there is less water diffusing light, and your strobe's light is maximized.
 |
|
Super-macro shot of a Sydney pygmy pipehorse, a tiny cousin of seahorses only found in and around Sydney (NSW, Australia). Photo credit: Nicolas Remy |
I would love a fixed, lightweight 15mm fisheye for Z mount. Another kind of lens that many underwater photographers like is ultra-wide-angle zooms. They’re great for situations where you can’t get as close, and also for photographing wrecks, which is the only time as an underwater photographer that you need straight lines in your scene to stay straight.
The most common mistake I see is people who assume that their normal 24-70mm or 24-120mm standard zoom will work for underwater photography. But because of the physics of refraction, the field of view changes when you have the camera in a housing. Suddenly your 'wide' end isn’t really wide anymore. That’s connected to the biggest mistake I see, which is people not getting close enough to their subjects. The closer you get, the more vibrant the colors will be, because the strobe light has less distance to cover, and there’s less water between the camera and the subject, so less of a reduction in contrast.
It depends on what they wanted to shoot, whether they’re more interested in closeups or wide angle shots. For wides, a beginner might struggle to get close enough with a fisheye, so I’d recommend a zoom, something like a 14-24mm or equivalent. For closeups, a medium telephoto macro lens like a 105mm would be perfect, or a 50/60mm macro lens, if using a cropped-sensor camera.
The Z9’s battery life is probably more than I need, but the battery in the Z8 is a lot smaller, so I’m curious to see how it holds up.
For someone who’s really just starting out and is unsure exactly what they want to specialize in, I’d recommend something called a “wet lens.” These are screw-in optics you can add to the housing to expand the field of view while maintaining excellent image quality. So if you have even a basic standard zoom like the Nikon Z 24-50mm, you’ll be able to get close to a fisheye view from it, just attaching the Nauticam WWL-C wet lens on the front of the housing. And at the 50mm end of the zoom, you’ll get a focal length that will work for portrait shots of midsized subjects. That would be a great “all-rounder” solution, which can also be expanded towards the macro range by adding a screw-on wet diopter.
It’s all about dealing with the loss of colors, contrast and details caused by the water column. The main thing is white balance, but also contrast and detail adjustments. I use the de-haze tool in Lightroom, and also selective sharpening on the subject itself. I also use the cleaning tools to remove some floating particles, if visible.
 |
| Two fur seals frolicking below the surface off Montague Island (NSW, Australia). Nikon Z9 + Nikon 8-15mm (at 15mm) fisheye with FTZ adaptor | ISO 400 | 1/200sec | F11 Nauticam NA-Z9 housing and 140mm glass dome port, 2x Ikelite DS230 strobes. Photo credit: Nicolas Remy |
I’ll be busy testing the Nauticam housing for the next few weeks here in Australia, in the waters around Sydney. Hopefully, we’ll be photographing a colony of fur seals. Seals are the closest thing an underwater photographer can get to action photography – it’s one of the few situations underwater when I’ll do burst shooting!
Nicolas Remy is a professional underwater photographer based in Sydney, Australia. His images have won over 35 international awards and are frequently published in Australian and international media. In 2023, Nicolas founded The Underwater Club, a first-of-its-kind online underwater photography school with over 40 self-paced lessons and monthly events.
Check out more of Nicolas Remy's work


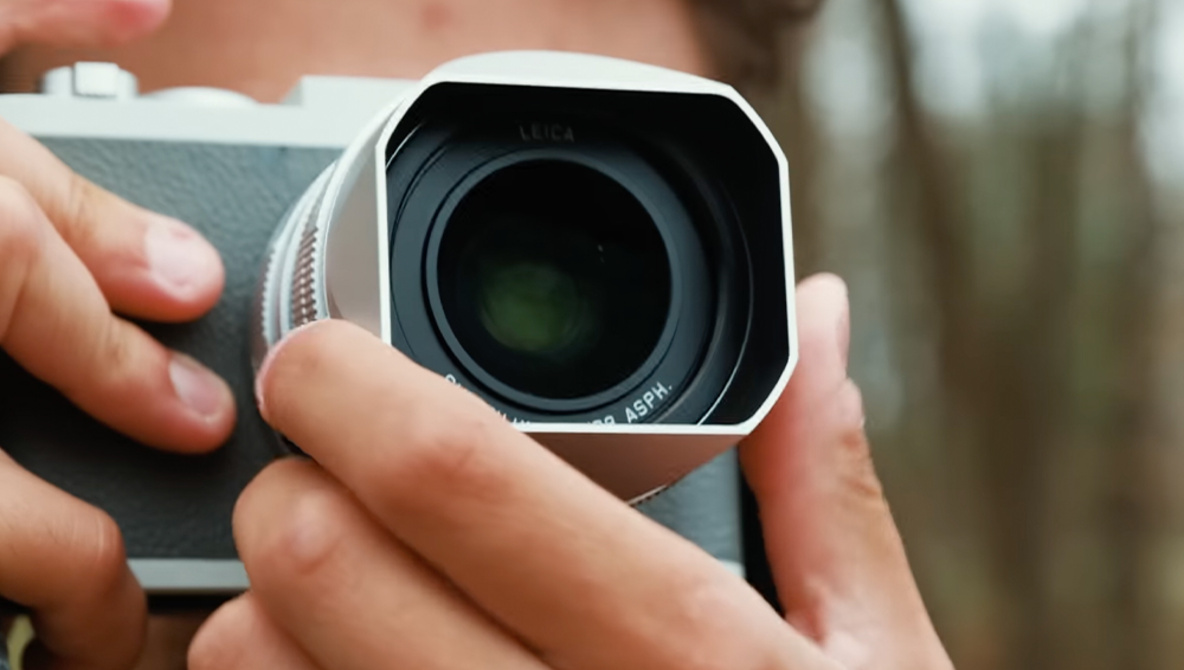
Leica announced an updated version of its Summilux-M 50mm F1.4 ASPH fast normal prime for its M lens mount in April 2023. The redesigned Summilux-M now has a closer minimum focus distance of 45cm (17.7"), down from 70cm (27.6"), 11 aperture blades (up from 9) and gains a metal hood that screws outwards, rather than the push/pull version on the older lens.
Manual focus is also the only option for the lens, so while F1.4 is attractive, focusing wide open is a test of both eyesight and a steady hand. Getting 100% perfect focus probably isn't realistic for a rangefinder lens (but we tried with the EVF, rear screen and with focus peaking on and off).
Also, a note about F-stop readings in the metadata: there is no communication between the lens and the Leica body so information within the EXIF file is not always the exact F-stop used for an image but rather the camera's best guess based on the M11's sensor readings.
Coupled with an Leica M11, we took the new lens out on the road for a few weeks to see how it performs.
View our Leica Summilux-M 50mm F1.4 ASPH sample gallery
 |
Here’s the problem with keywords: although they make finding photos easier, the act of tagging images is time-consuming busywork we don’t want to do. So we plod forward, skipping the keywording step and relying on our fuzzy memories to scan through libraries looking for the images we want. But what if we could get descriptive keywords without entering them ourselves? That’s the promise of ON1 Photo Keyword AI, a new utility that uses AI technologies to identify scenes and objects in images and create relevant keywords.
The big players have turned to AI to bypass the keywording stage, but in an often frustrating, opaque way. Apple Photos, Google Photos, and Adobe Lightroom (the desktop and mobile versions, not Lightroom Classic), for example, all scan your images for things the machine learning models recognize. The upside is that you can search for things like “leaves” or “cloudy skies” or “cars” and usually get results that contain the items, even if the images were never specifically tagged with those terms.
The downside is that you don’t know which objects or characteristics are associated with any given photo. You’re going on faith that the app or service is doing a good job. Did the software grab every image in your library that contains a car? What about less tangible terms? A recent search for “snow” in Apple Photos brought up snowy scenes, but also a black and white photo and an image of pale rock formations in the summer.
 |
| The Apple Photos app doesn't know that the black and white photo or the rocks at right do not actually contain snow. |
ON1 Photo Keyword AI does the same type of scanning, but presents the actual keywords it generated and adds them to photos in a transparent way.
ON1 Photo Keyword AI is a standalone app built on ON1’s browsing and catalog technology that undergirds its flagship ON1 Photo RAW editor. (In fact, the latest release, ON1 Photo RAW 2023.5, incorporates the Photo Keyword AI features.) Unlike the company’s other individual tools, this one is not available as a plug-in for other apps such as Lightroom Classic, though there is a way to make it work with other apps (which we’ll get to later).
ON1 Photo Keyword AI is a standalone purchase retailing for $69.99, which includes activation on up to two computers, and is available for macOS and Windows systems.
To get started in ON1 Photo Keyword AI, you browse to a folder of images on disk, and then select one or more photos to scan.
 |
| Browse a folder of images in ON1 Photo Keyword AI. |
In the Metadata panel at right, expand the AI Keywords section (if it’s not visible) and click the Scan button. The app reviews the image(s) and builds a set of keywords that appear in the field below.
 |
| After scanning, ON1 Photo Keyword AI has come up with a set of keywords based on what it identified in the selected image. ("Cascades2" is the name of the folder in which the photo appears.) |
It’s important to point out that the scanning happens locally; images are not uploaded to a cloud processor or used for further machine learning training. The scanning time depends on the capabilities of your computer and the number of images selected for scanning. On a 2021 MacBook Pro with an M1 Max processor and 32 GB of memory, scanning a single image took a few seconds. Processing a folder of 74 raw images took just under 6 minutes. A batch of 500 photos from an event containing numerous people took about 38 minutes.
By default, the generated keywords are automatically applied to the photos, either embedded directly into the image files (for formats such as JPEG) or written to .XMP sidecar files (for raw images). You can see the terms added in the Keywords field.
It’s important to point out that the scanning happens locally; images are not uploaded to a cloud processor or used for further machine learning training.
Alternatively, you can choose to add the keywords manually by turning off the Automatically Embed Metadata setting. In that case, clicking the arrow icon on a suggested keyword adds it to the selected image(s). (Clicking the X that appears when you mouse over a suggested keyword removes it from the AI Keywords field.)
Or, if you’re satisfied with the results of a scan, you can click Add All to tag the photo(s) with every found keyword. Be aware, though, that if multiple images are selected, they each get all the terms, even ones that were not suggested for specific photos. For example, if a person appears in one image but not another, and they’re both selected, clicking Add All tags both photos with the “Person” keyword.
In addition to working with photos on your drives, ON1 Photo Keyword AI can scan images as you import them from a camera or memory card, front-loading the keyword process in your workflow. They get saved to a folder of your choice and tagged with the discovered keywords; if you use an app for organizing your library that recognizes XMP files, the keywords should appear when you add the photos.
 |
| ON1 Photo Keyword AI can import photos directly from a card or camera and scan for keywords during ingest. |
One of the values of an app like this is the ability to make suggestions you may not consider. For instance, a photo of a person taking a photo of trees brings up descriptors such as “Outerwear,” “Backpack,” and “Luggage and bags” in addition to expected terms like “Person” and “Tree.” It also pulls words from metadata such as the location-based “Stehekin” (a town name) and “Chelan County” where the image was captured, if the GPS data is already embedded in the image file.
 |
| The app may generate more keywords than needed, but it also incorporates information like location ("Chelan County" here) if present in the file. |
That said, the app does tend to throw everything it finds at that Keyword field. Is it important that a series of photos contain the term “Biome” or “Habitat”? Probably not. In our testing it also tended to mark many animals as “Bear” and added “Carnivore” to the mix. Your pet may indeed be a carnivore, but that doesn’t seem like a keyword you’d often search for when trying to locate images of your cat FluffySnuggles. (Counterpoint: cats.) As another example, we also ran instances where scanning portraits and photos specifically including people served up keywords such as “Human arm,” “Human hair,” “Finger,” “Organ (Biology),” and “Human action.”
It’s easy to make fun of such results because our brains automatically sort out unnecessary terms when we’re evaluating photos. The machine learning models are designed to describe the contents of scenes based on what the models have been exposed to previously. Honestly, it’s probably better to include too many keywords than too few.
And some of those terms are helpful, such as marking images that have “1 Face” or “2 Faces.” The app does a good job of estimating general ages, making it possible to identify photos that contain “Child,” “Teenager/Young Adult,” or “Elderly” subjects. However, although it can discern when people are in the frame, the app isn’t doing any person recognition. It would be helpful to tag all selected images that contain your friends John or Clara, for instance.
If that’s too much, the ON1 Photo Keyword AI settings include general categories that can be turned on or off, such as Photographic Properties and Histogram Properties.
 |
| Choose which broad categories of information to include during a scan (default selections shown). |
For terms the software didn’t generate, you can type new keywords and append them to the selected images. You can also remove terms you don’t want, although with the default settings it's a two-step affair: you must first remove the term from the AI Keywords field (by clicking the X that appears on its icon) and then deleting it from the Keywords field. You can scroll down through the Keyword List, which is the database of all keywords collected or generated, and deselect or delete terms, but that’s a lot of steps.
If you use another app to manage your photo library, you have a few options for integrating ON1 Photo Keyword AI into your workflow. One approach would be to import photos from the camera or memory card directly into ON1 Photo Keyword AI (or copy them to your drive and open them in the app), scan for keywords, and then import the processed files in your library manager.
Or, if the photos are already in your library, process the files using ON1 Photo Keyword AI and synchronize the metadata in the library app. For example, you can navigate to a folder that Lightroom Classic already tracks, and then scan the images, which by default embeds the keywords. Lightroom tends to be cautious about blindly updating files it already watches, so you need to manually synchronize the images’ metadata with what’s on disk.
When you see the icon on photos indicating that the metadata on disk is different from what Lightroom expects, click it and choose to overwrite the metadata from disk.
 |
| After reading the updated metadata from disk, Lightroom Classic includes the keywords in its Keywording panel. (Terms with asterisks appear in some, not all, of the selected images.) |
In Capture One, as another example, you’d select the images that were processed in ON1 Photo Keyword AI, right-click, and choose Sync Metadata from the contextual menu. Apple Photos, on the other hand, ignores XMP files, so keywords will only appear in photos where the terms have been written to the image file, such as JPEG or DNG images.
Although the AI scanning is the app’s headlining feature, ON1 Photo Keyword AI is also a full metadata manager, including star ratings, flags, color labels, and IPTC data. There’s also a Map view and the ability to compare photos when evaluating how to rate them. Basically, you could do all of your sorting and culling in ON1 Photo Keyword AI before passing the photos along to the image editor of your choice.
The app builds a database of keywords you’ve used and that have been generated, which are editable in the Keyword List. Misspell a keyword you entered? It can be corrected here, which applies the change to any photo the app tracks. (If the photos were previously added to your photo editor, such as Lightroom Classic, you would need to synchronize the metadata again.)
You can also create Cataloged Folders for frequently-used folders (like a portfolio you add images to regularly), which caches the metadata for faster performance within ON1 Photo Keyword AI, reducing the reliance on reading data from every file on disk.
Generating keywords seems like a perfect task for AI. It’s coming up with terms, many that you may not have thought to add, and applying them to many images in a short amount of time. Granted, as with any current AI technology, the results that appear after a scan get you most of the way there–you may end up adding some specific terms and deleting others to match what the software may have missed or which are specific to your needs (like moods or event names). The advantage is having many valid terms to work with instead of nothing at all.
In our testing, we found that adding a separate utility dedicated to keywording required us to reevaluate our workflows. Running ON1 Photo Keyword AI and synchronizing the metadata in Lightroom Classic is an extra step beyond our usual approach of adding keywords during the import stage. (If you already use ON1 Photo RAW as your library manager and photo editor, the feature is already built in.) However, having more metadata–particularly terms we don't have to come up with ourselves–makes the addition worthwhile. And especially if you don't currently apply any keywords to your photos (but know that you probably should), throwing the app into your workflow ends up giving you plenty of searchable metadata with very little work.
 |
| Even their distinctive pink-hued appearance doesn't register to the app that these are flamingos. |
If, on the other hand, you're fastidious about the keywords you apply, ON1 Photo Keyword AI might be overkill, or at least overwhelming. You'll likely need to add context-specific keywords to the mostly generic terms that the software adds. For instance, in a recent scan ON1 Photo Keyword AI correctly determined that a photo included birds, but wasn't savvy enough to identify that they were flamingos. But that's something you would have added anyway without using a separate utility for generating the keywords.
 Nikon Zf review: the classiest mirrorless of them all?
 Slideshow: Winners and finalists of Smithsonian Magazine’s 17th Annual Photo Contest
For the birds: 2023 Audubon photography awards winners
Slideshow: Winners and finalists of Smithsonian Magazine’s 17th Annual Photo Contest
For the birds: 2023 Audubon photography awards winners
 Video: What it's like shooting Sigma's $26K 200-500mm F2.8 'bazooka' lens on a Sony a7 III
Photography Mistakes I Made as a Beginner
National Geographic selects ‘Pictures of the Year’ photo contest winner
Slideshow: Winners and finalists of Smithsonian Magazine’s 17th Annual Photo Contest
Video: What it's like shooting Sigma's $26K 200-500mm F2.8 'bazooka' lens on a Sony a7 III
Photography Mistakes I Made as a Beginner
National Geographic selects ‘Pictures of the Year’ photo contest winner
Slideshow: Winners and finalists of Smithsonian Magazine’s 17th Annual Photo Contest
 Field review: Fujifilm XF 70-300 F4-5.6 R LM OIS WR
Ricoh GR IIIx vs Fujifilm X100V: which is the photographers' compact king?
Canon EOS R7 - Five Tweaks You Need to Know
Field review: Fujifilm XF 70-300 F4-5.6 R LM OIS WR
Ricoh GR IIIx vs Fujifilm X100V: which is the photographers' compact king?
Canon EOS R7 - Five Tweaks You Need to Know
0 comments: